 Google Docs tables" />
 Google Docs tables" />
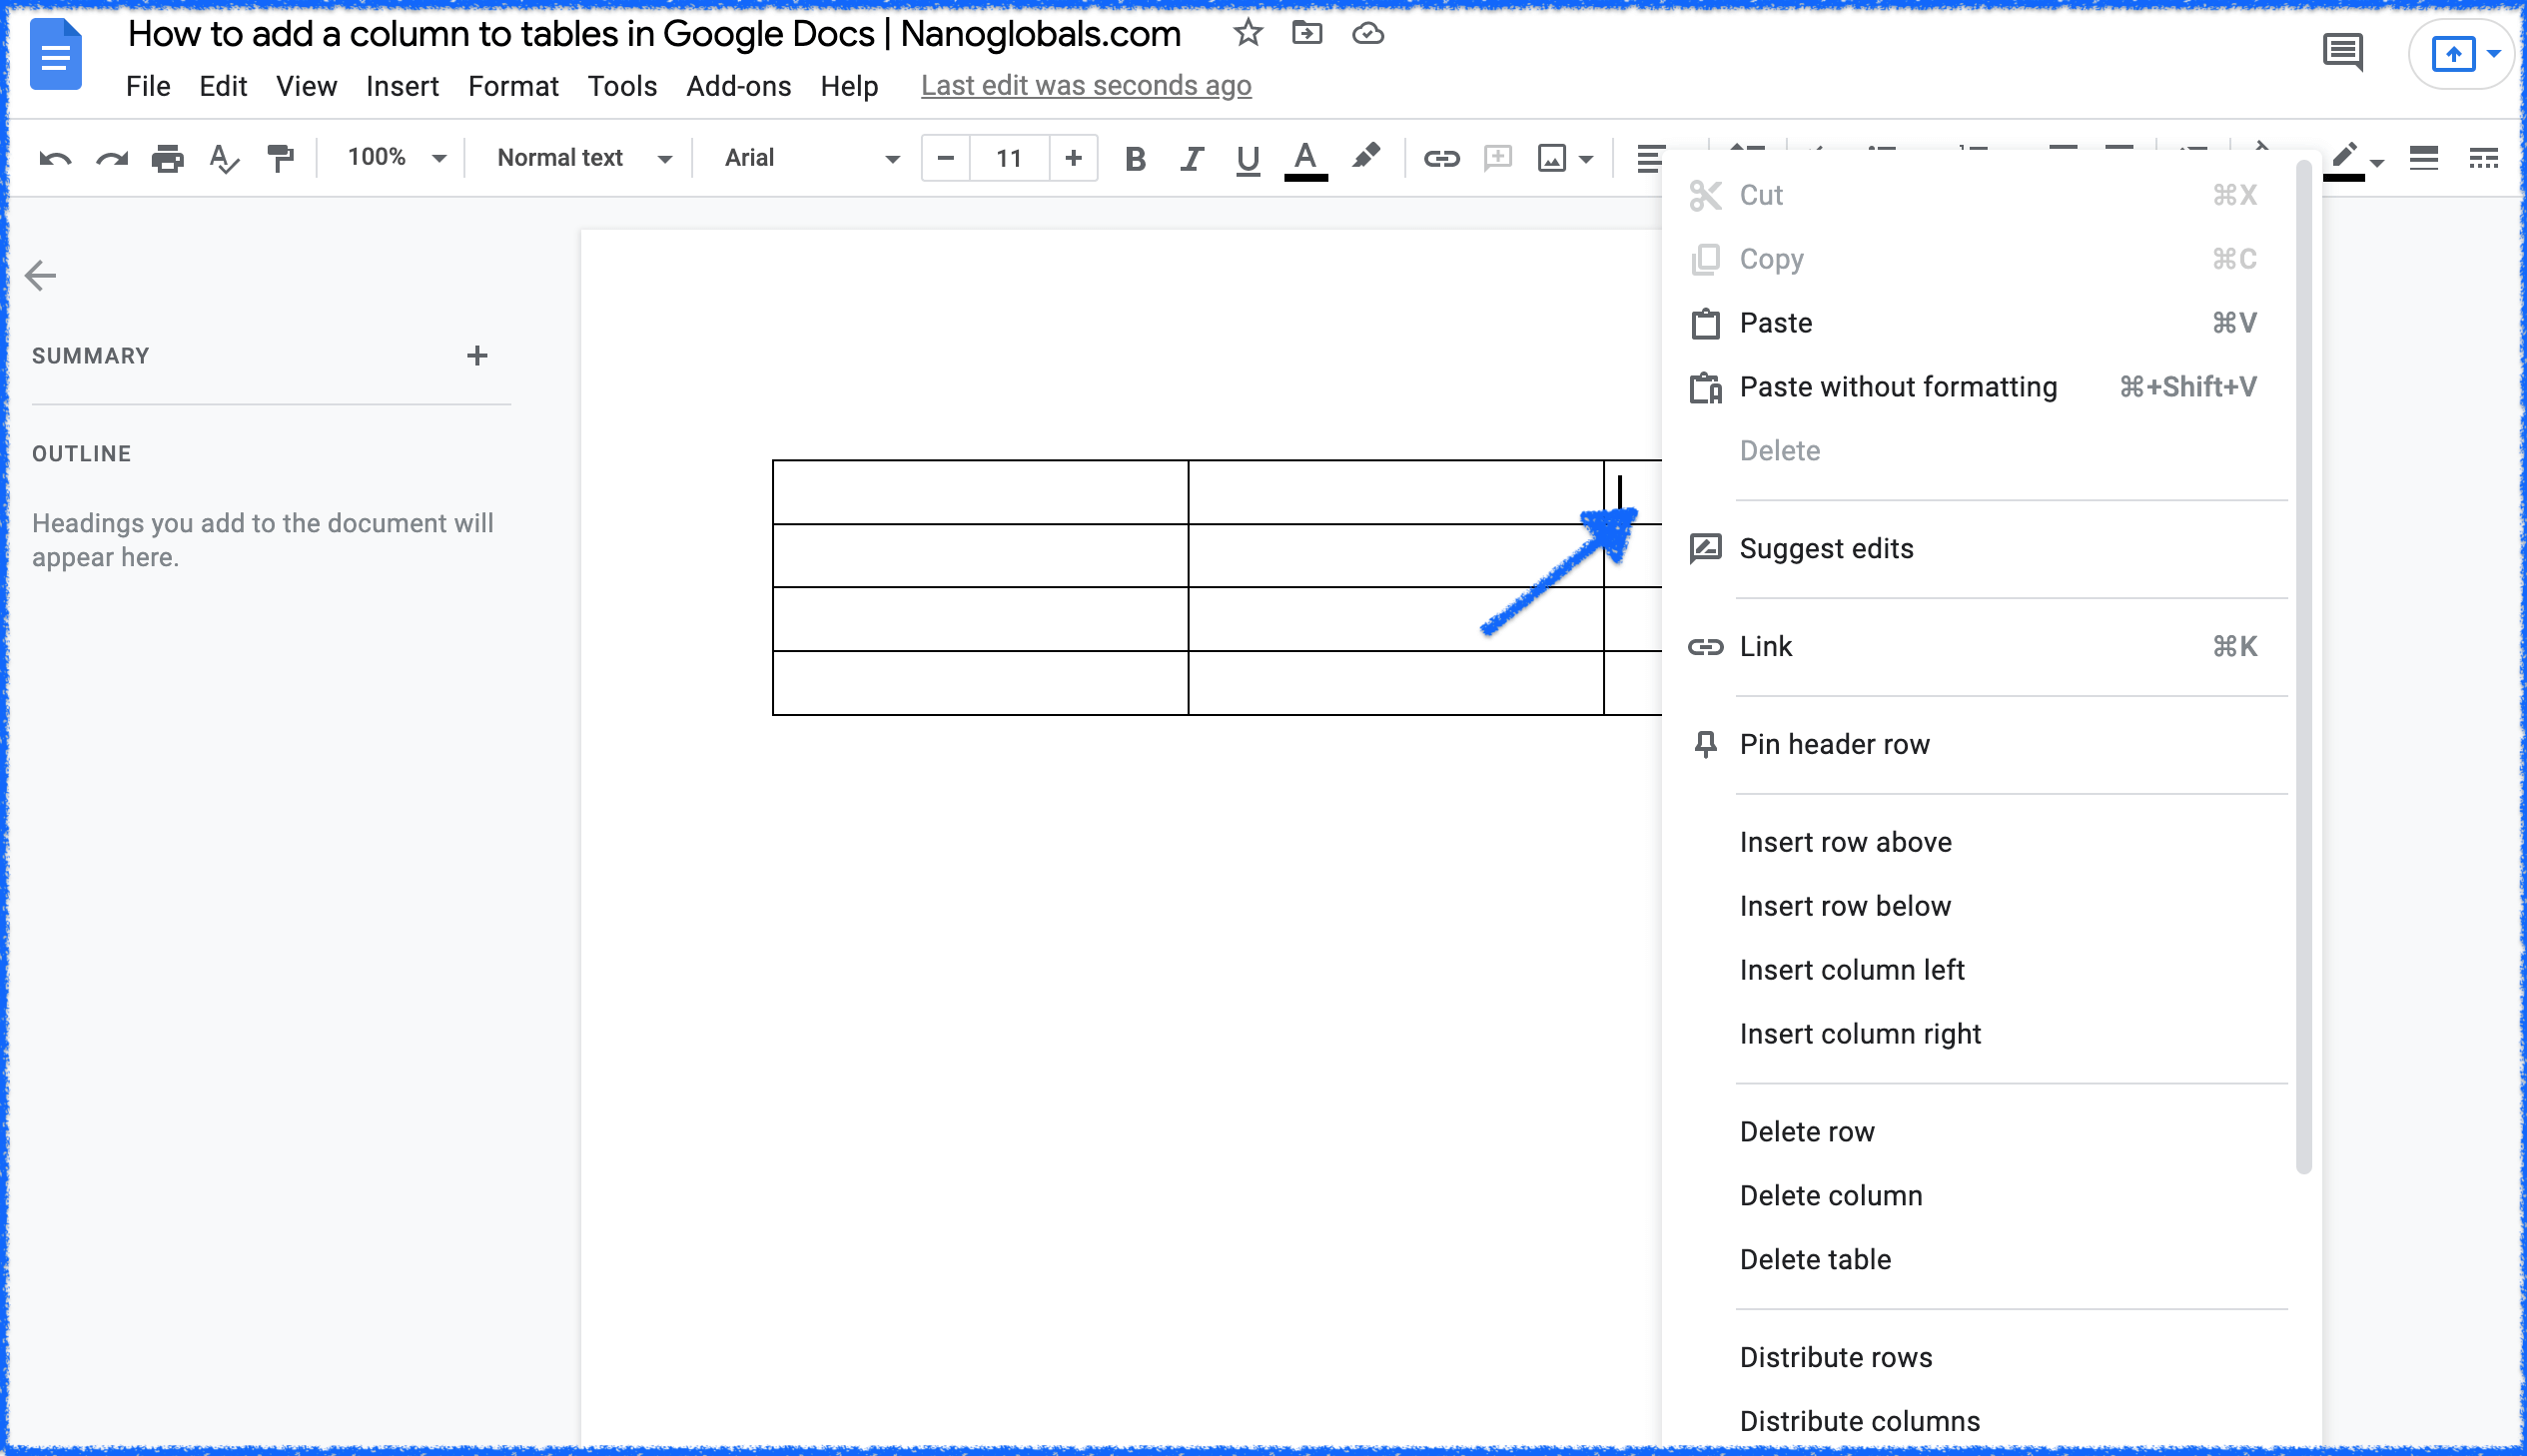
The easiest way to add a column to a table inside Google Docs is to right-click an existing column and select Insert column right or Insert column left. The same menu provides options for removing columns, and adding or removing rows.
When adding a column to the right of an existing column, there’s an even faster option: hover over the column to the left of where the new column should go, and a + button will appear above the column. Click it, and a column will be automatically added to the right.
These same methods apply to rows — just interact with the bottom left of the table to access the “+” shortcut to add rows.
Keep reading for step-by-step, illustrated instructions on how to add, delete, and edit columns in Google Docs tables.
Learning all the tricks with Google Docs tables only takes a few minutes, and makes you look like a wizard at work.
Quick tip: on a Mac, "right-click" can be done by holding the Control key while you click (Control-click). On a Windows laptop, you can "right-click" by pressing down with both fingers on the touchpad.
Here is exactly how to add a column to a table inside a Google Doc:
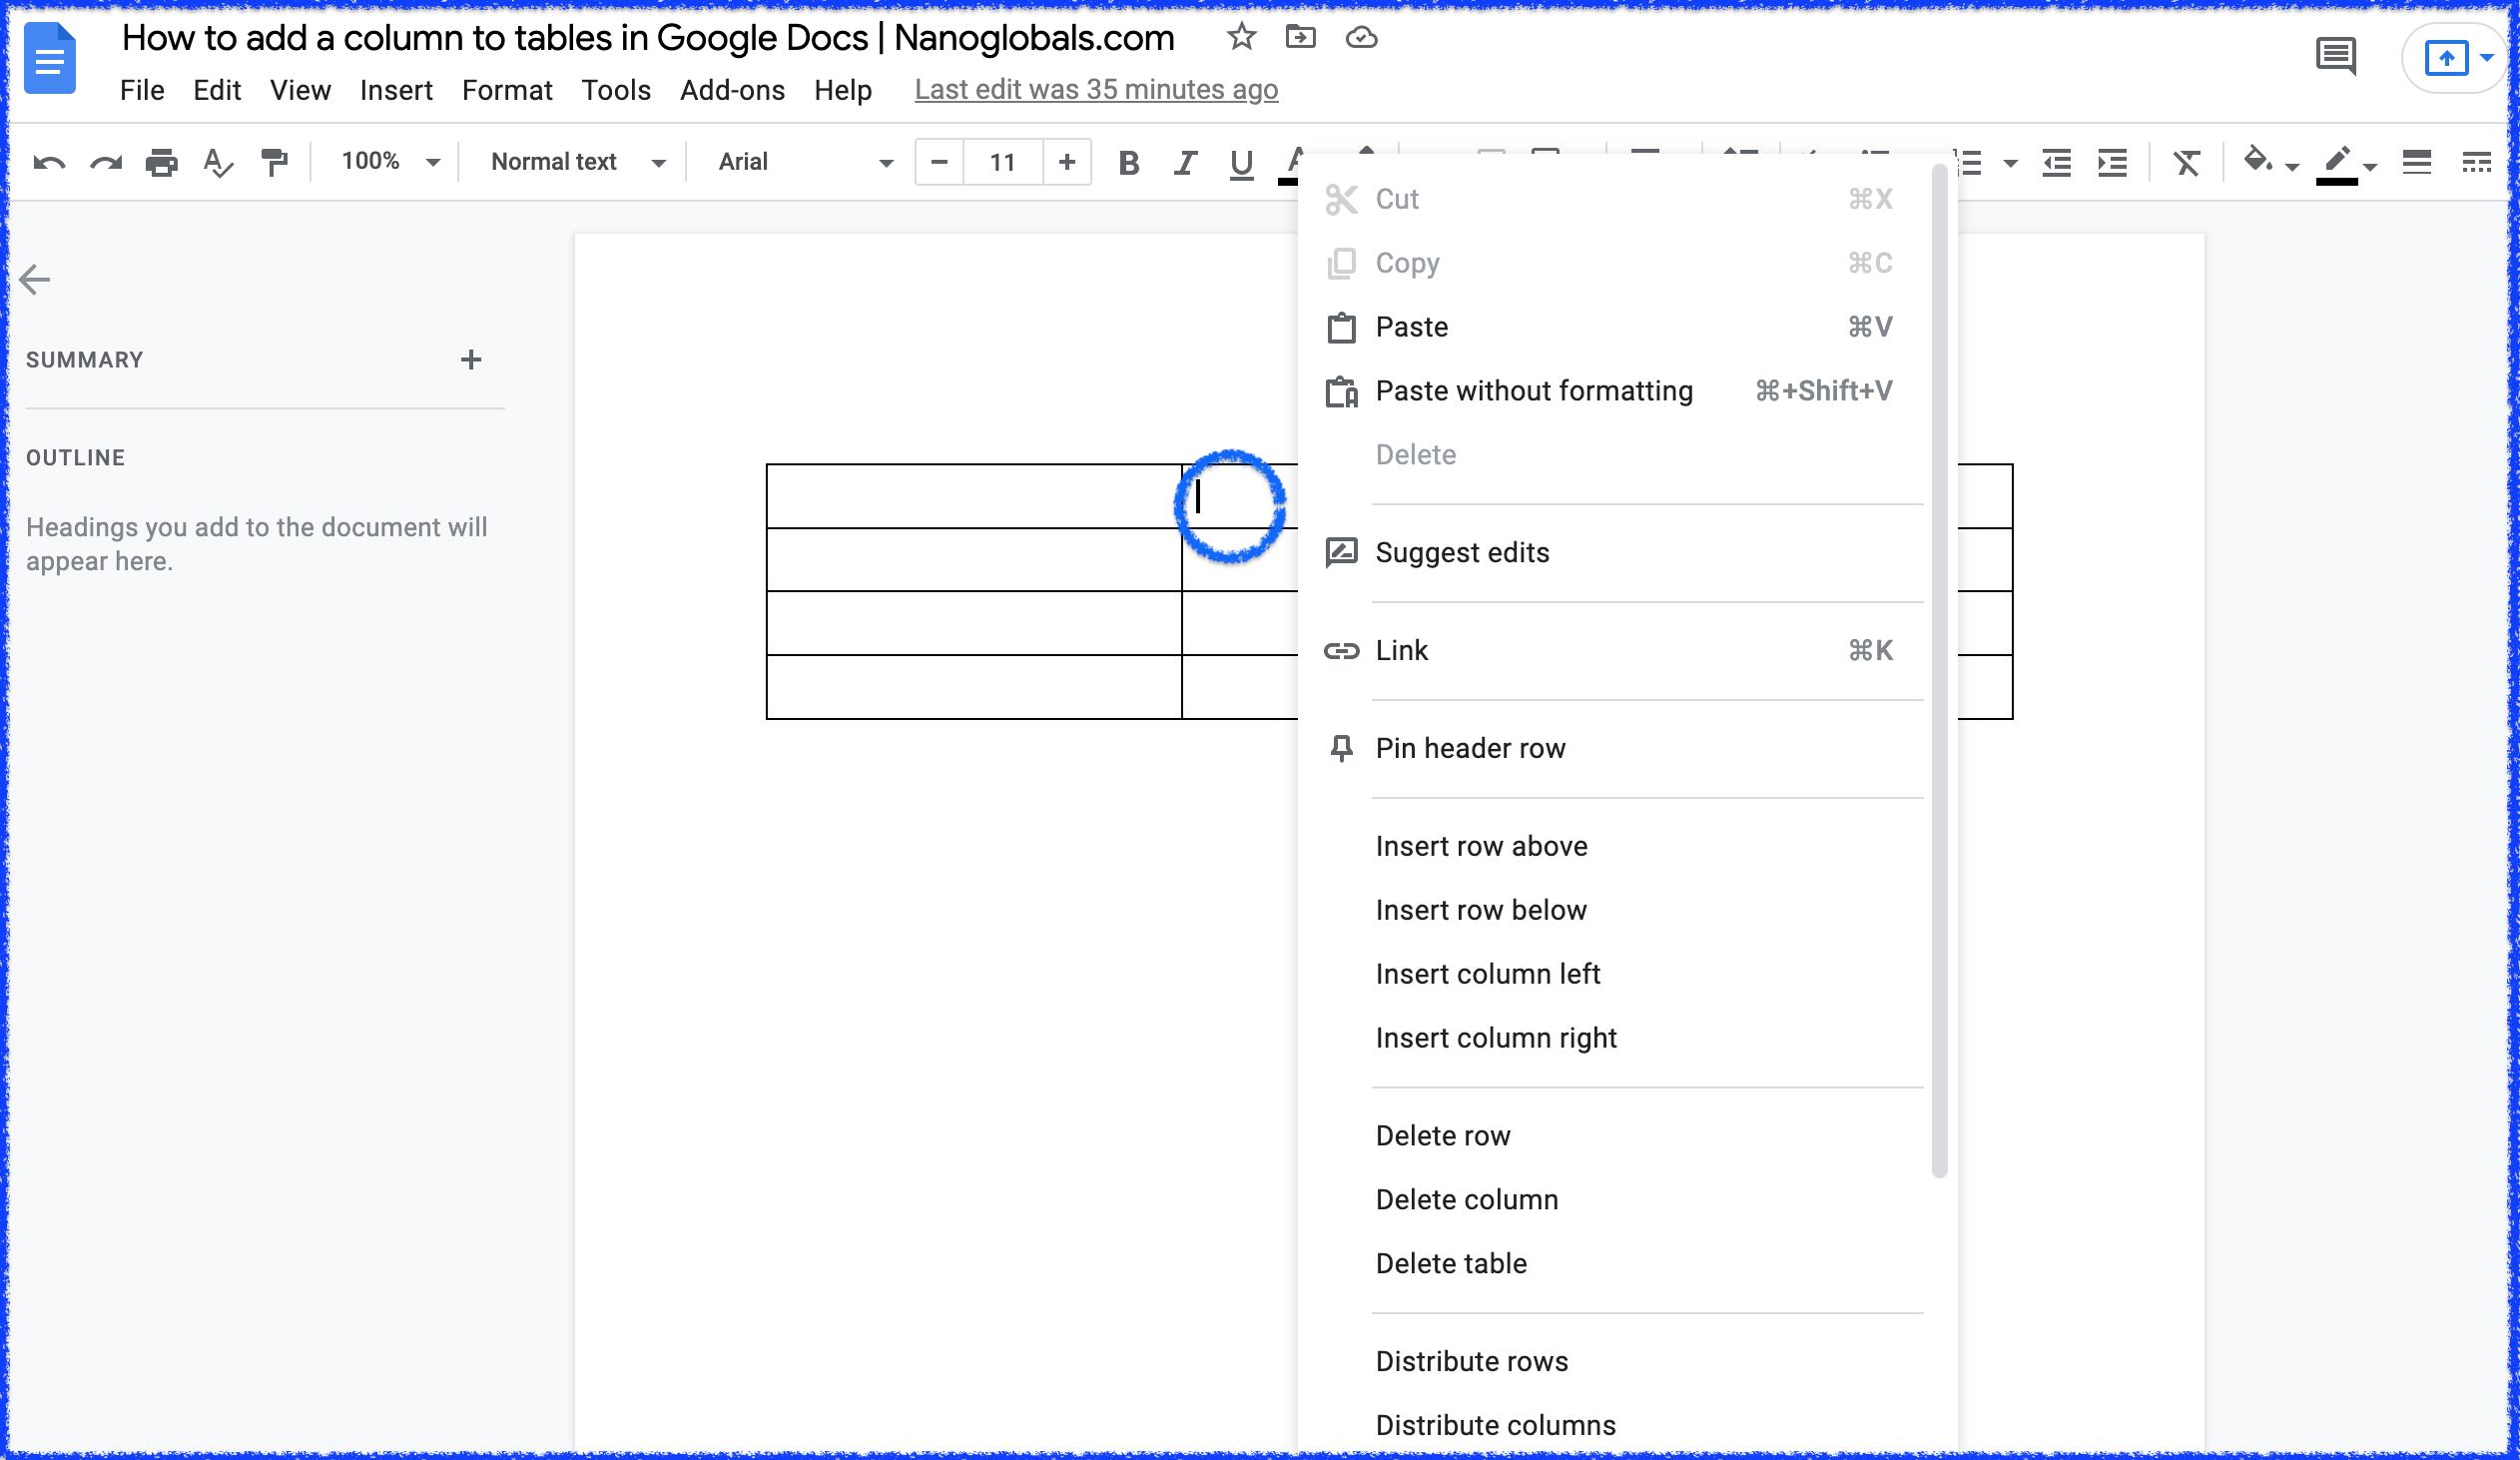
Right-click an existing column in your table:

Make sure the column is adjacent to where you want the new column to go.
“Insert column” options can be found midway in the menu, under the “Pin header up to this row” option.
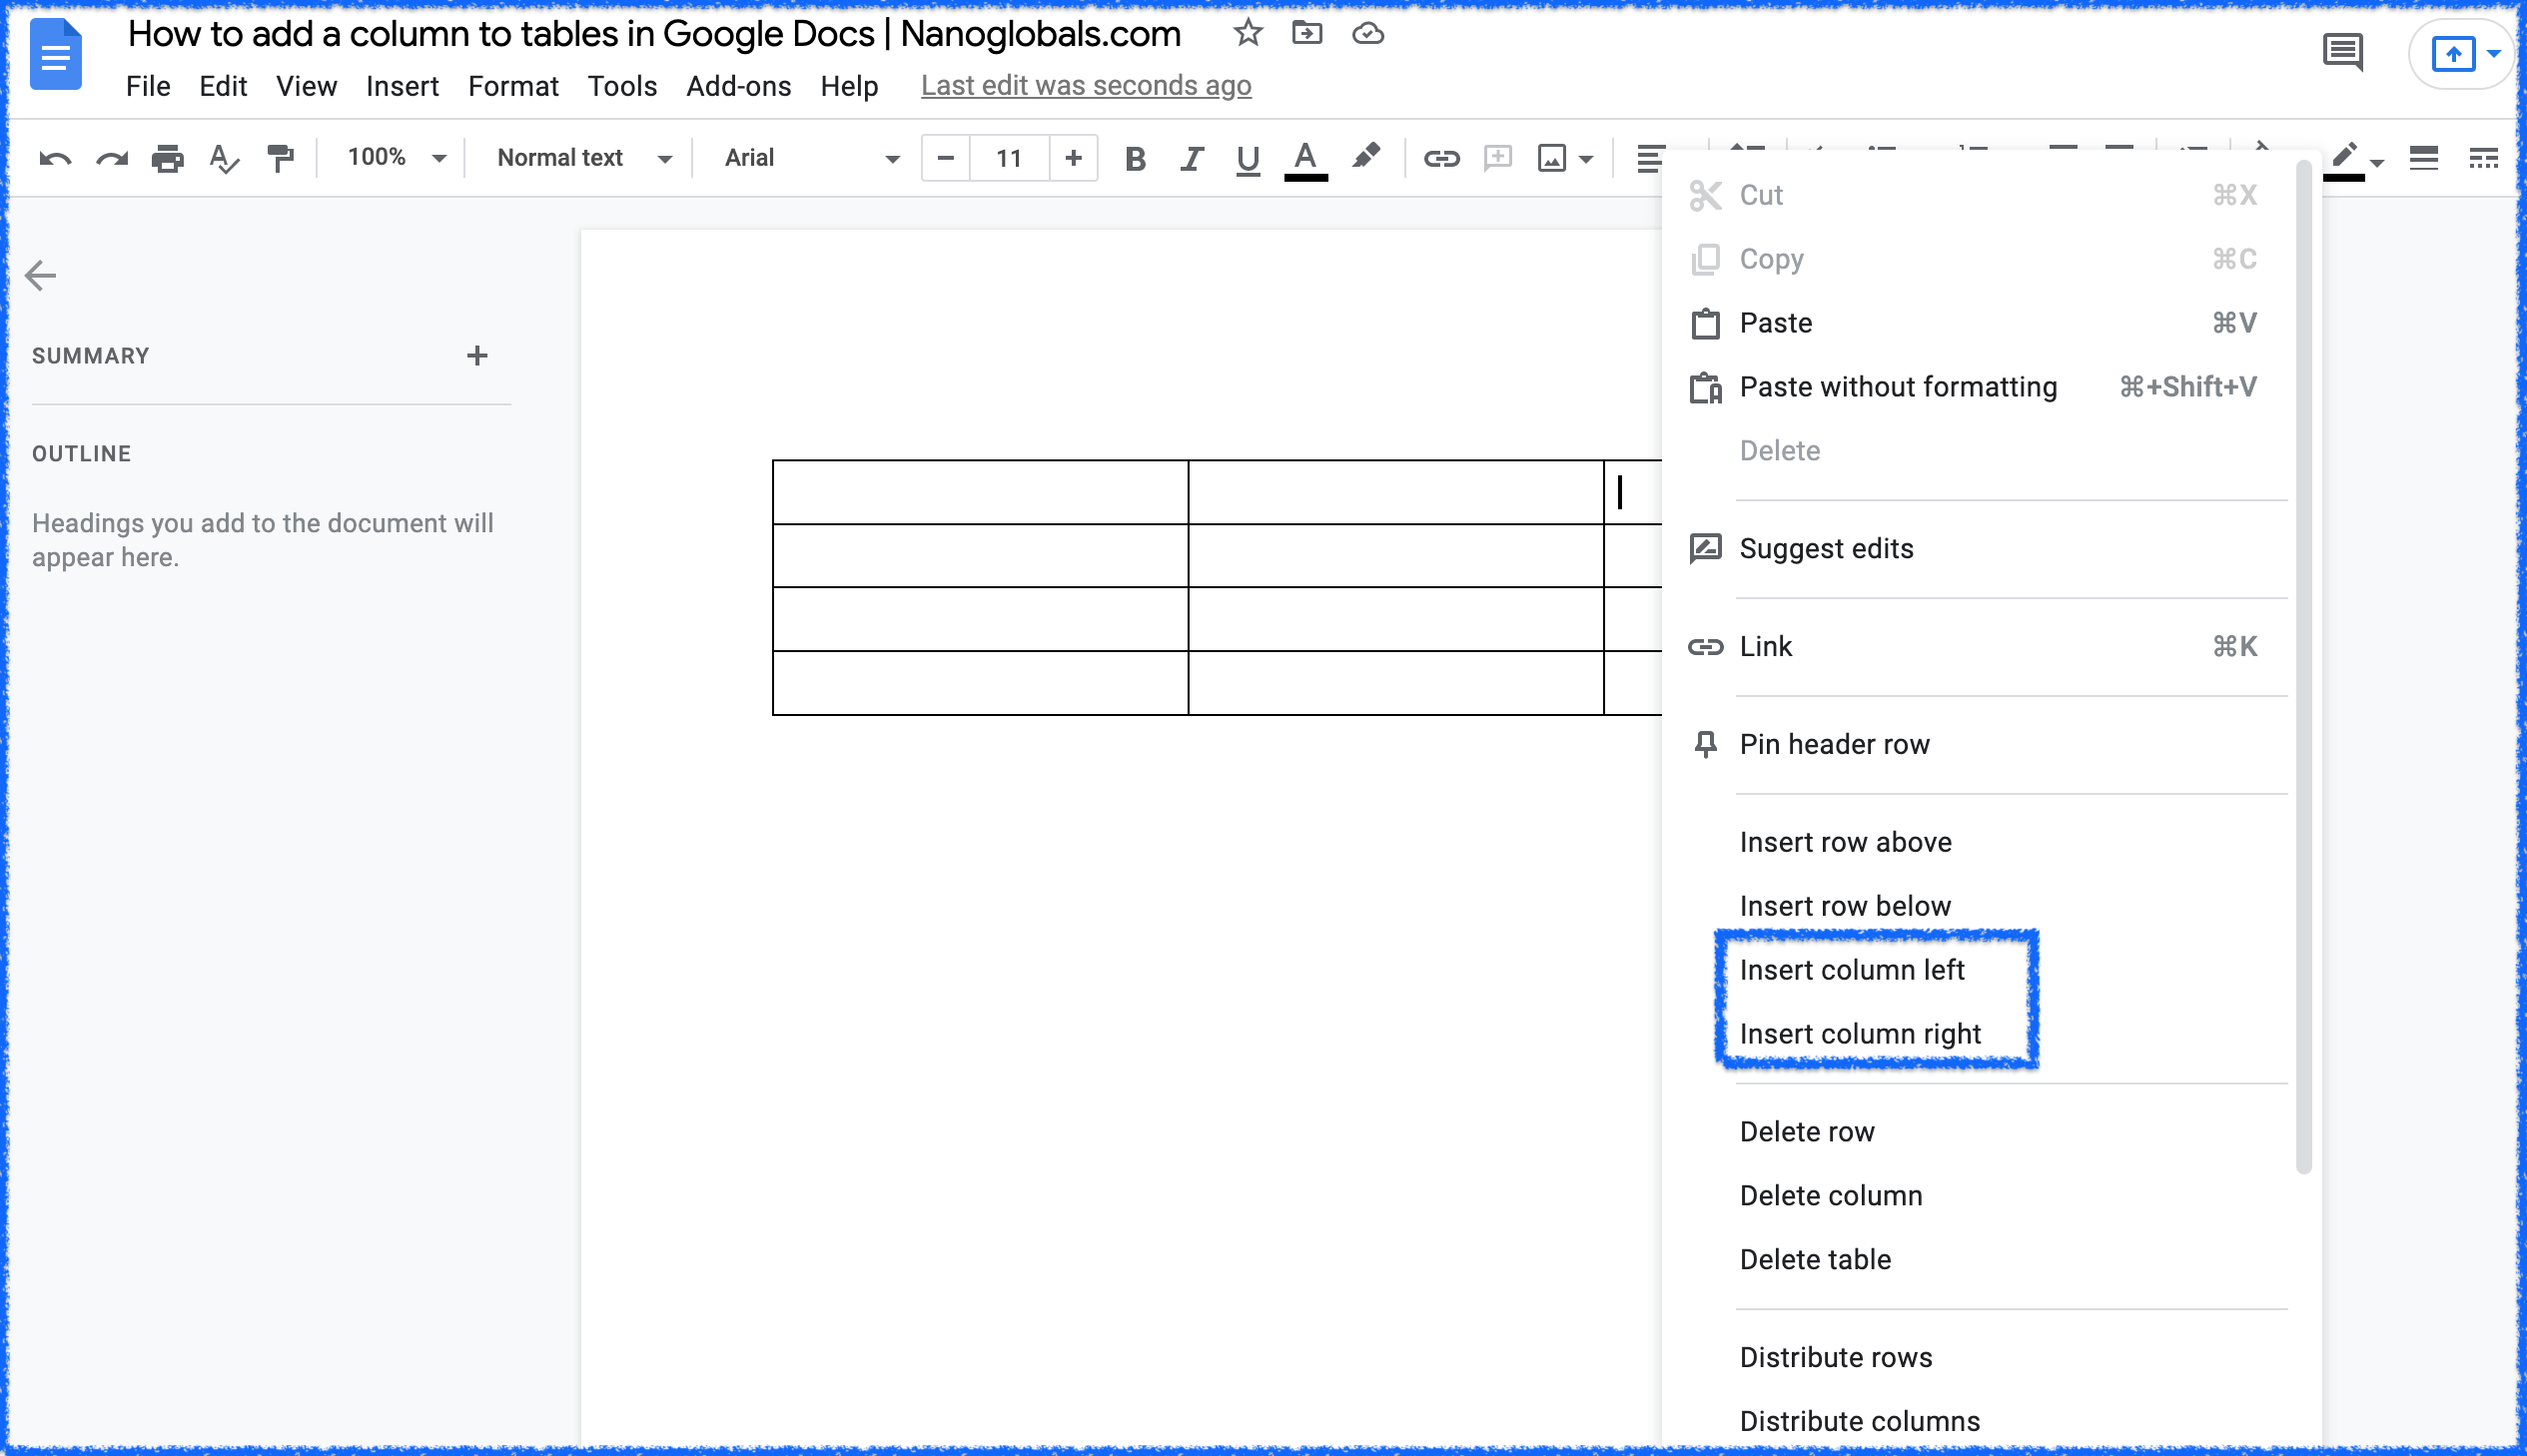
You have two options for inserting a column: “Insert column right” and “Insert column left”.
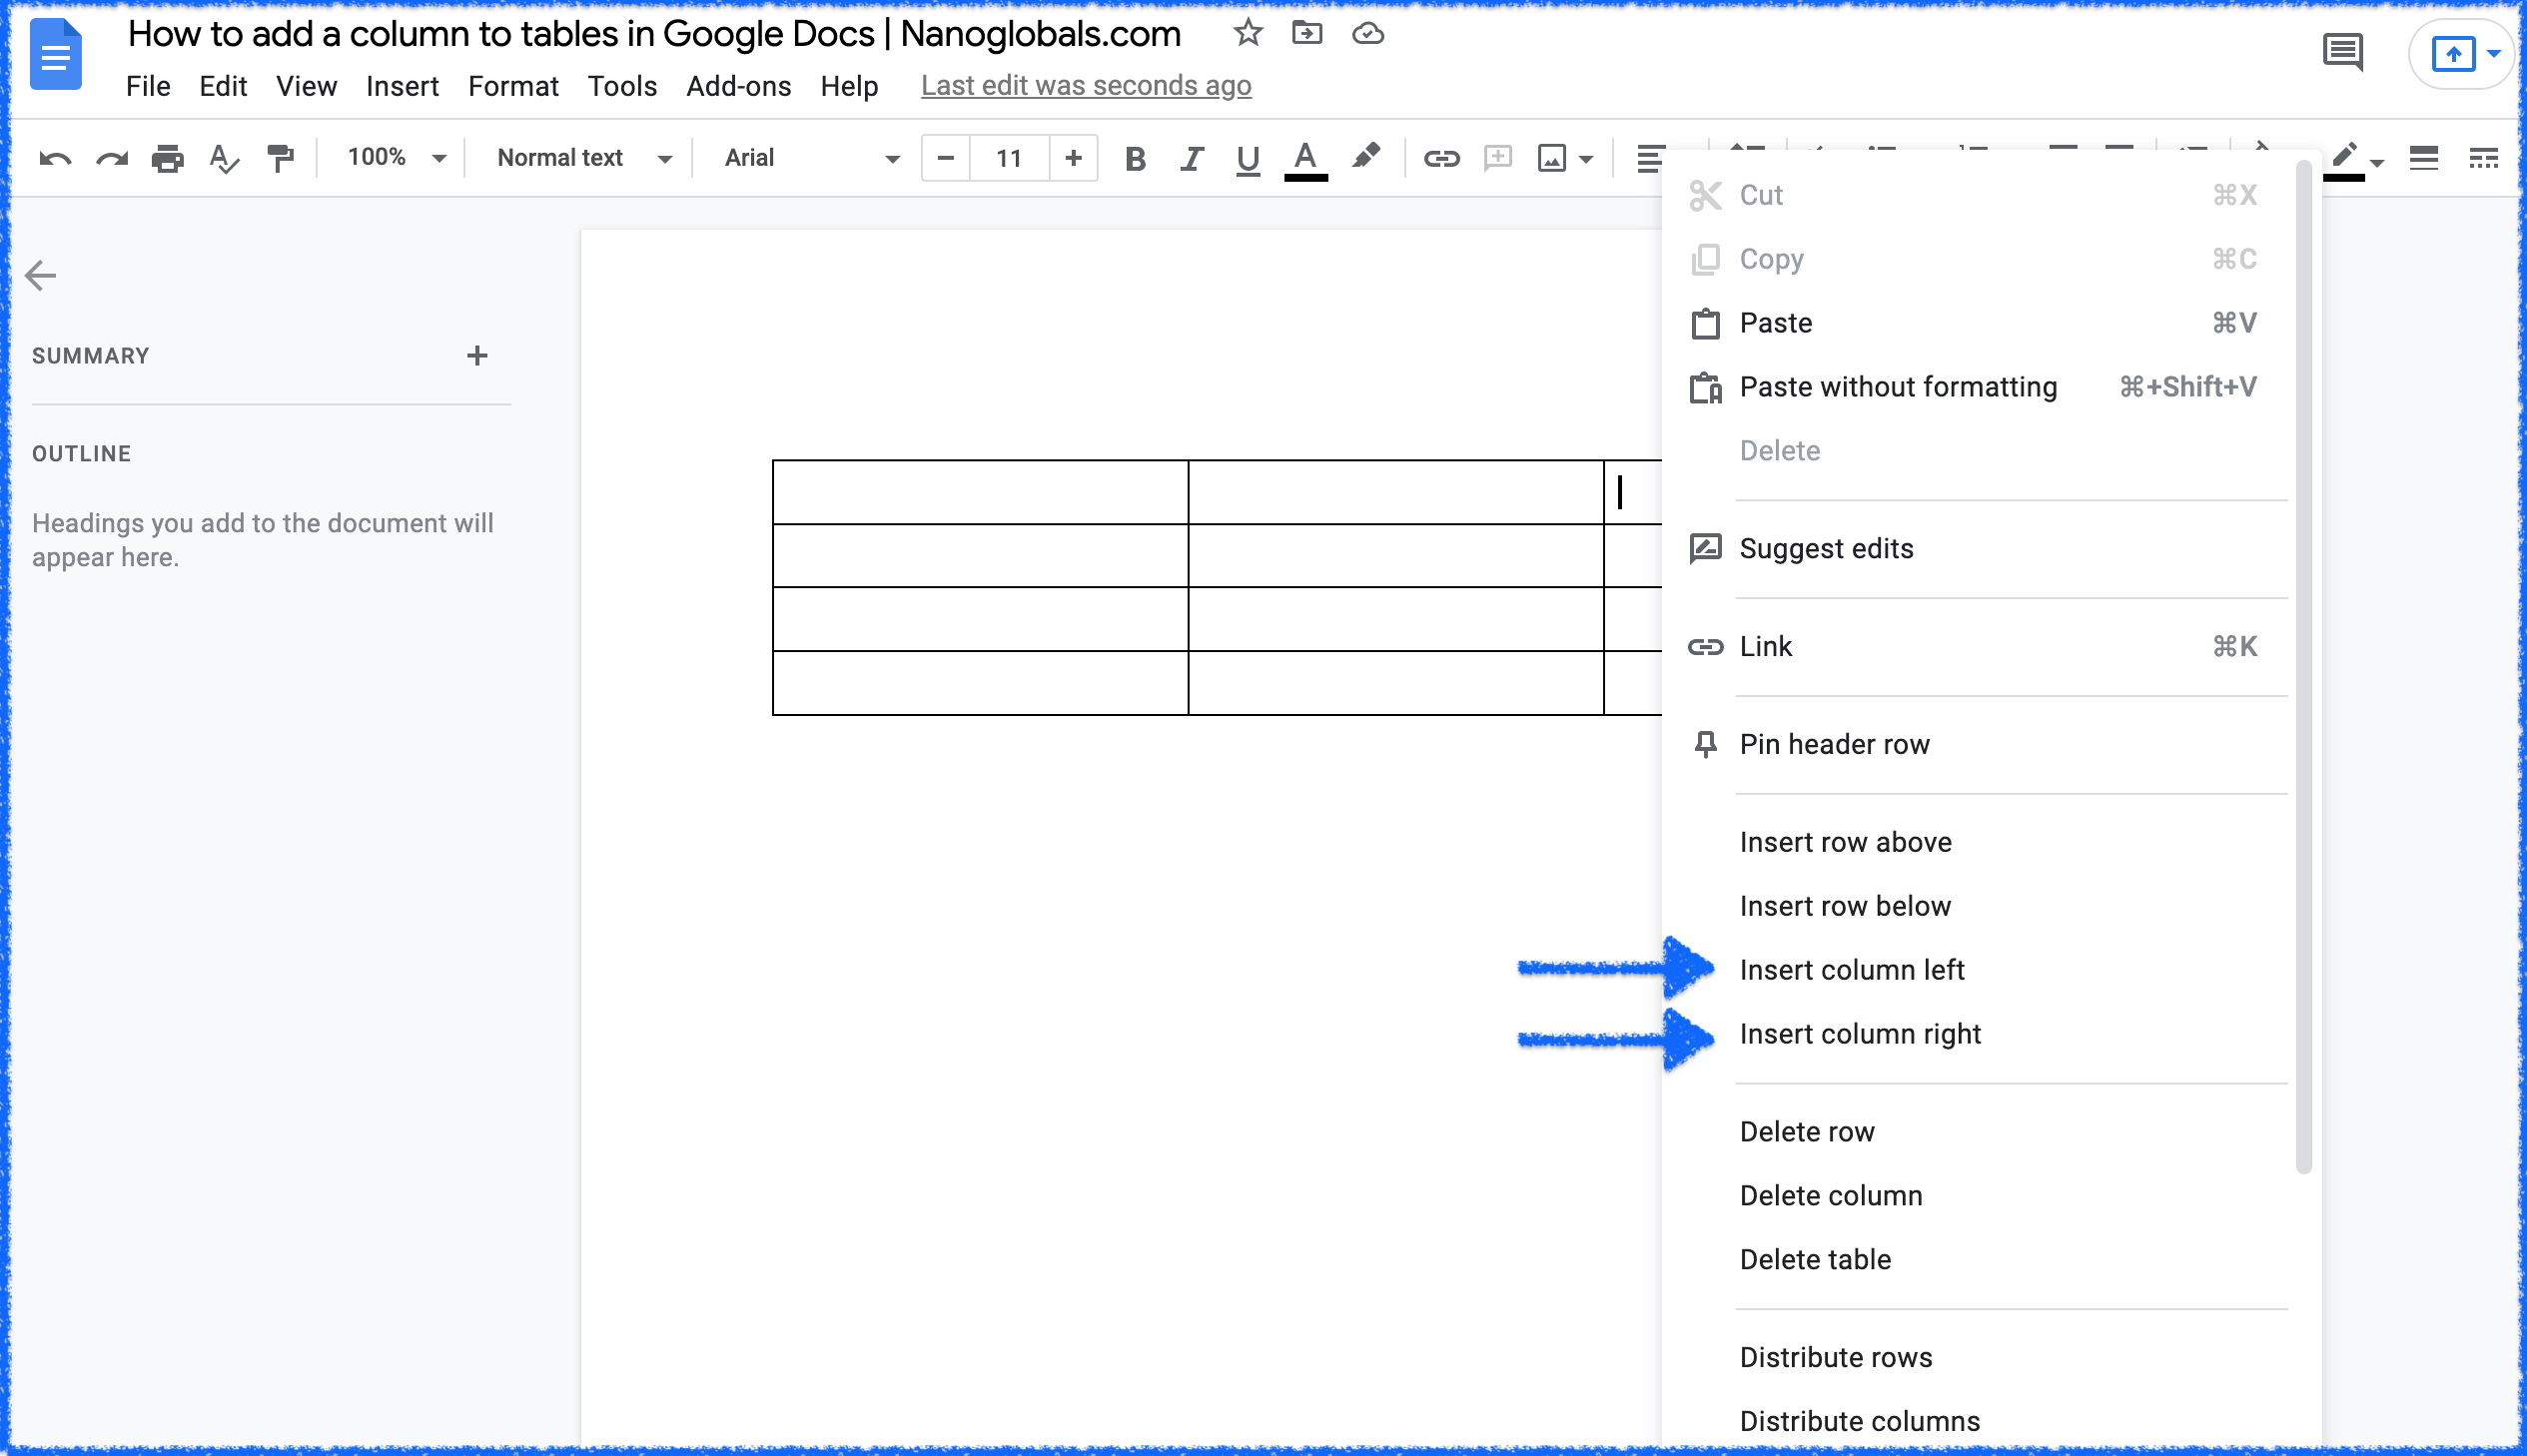
As the names suggest, “insert column right” will add a column to the right of where you click. Selecting “Insert column left” will add a column to the left.
In most cases, users are adding a column to the right of a table because they didn’t add enough columns when inserting the table to the Doc.
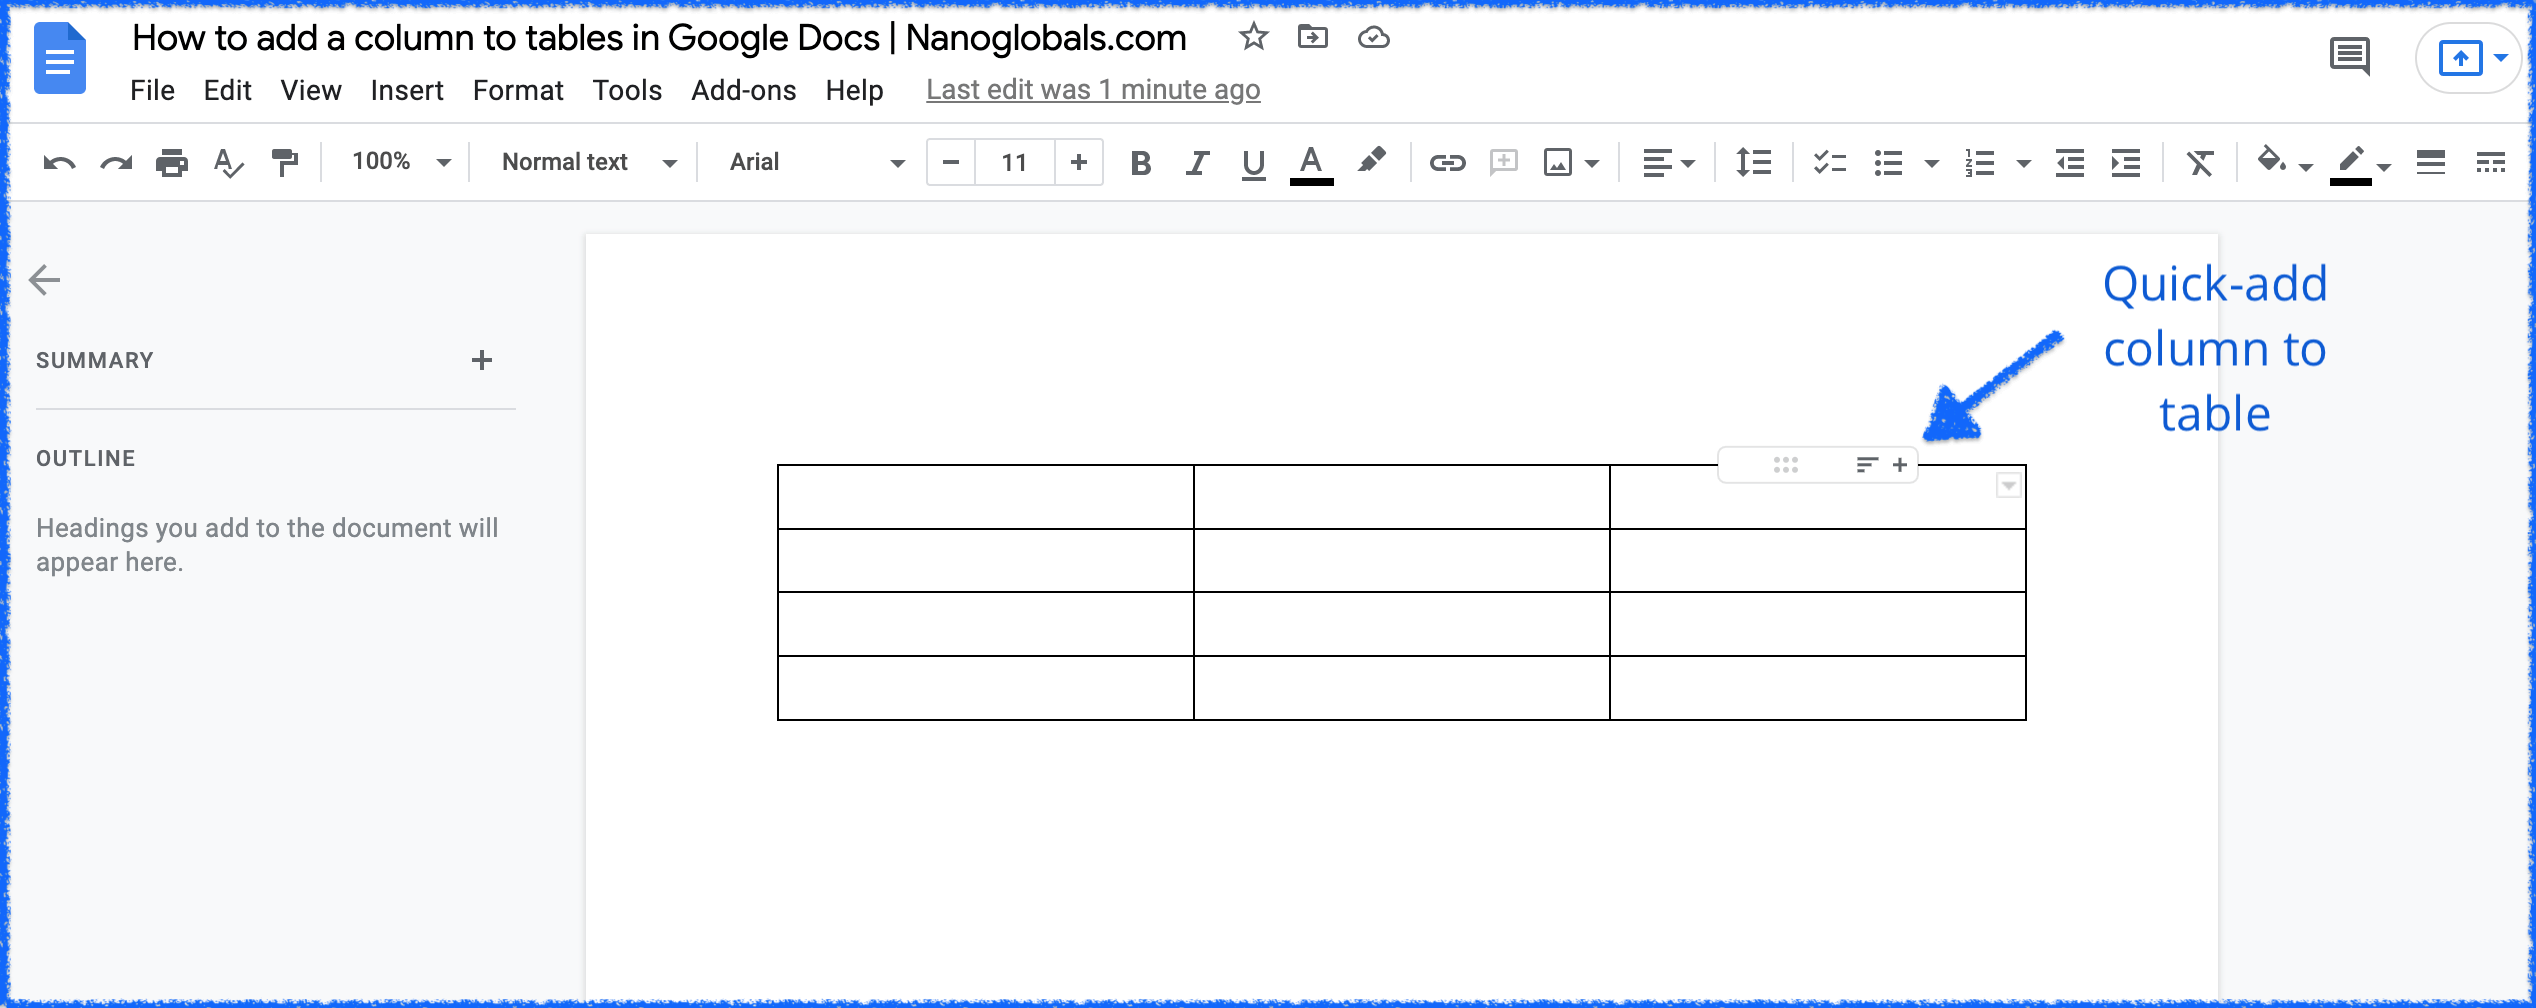
Hover over the far-right column and use the “quick add” button if you are simply adding a column to the right of an existing column, rather than adding a column in-between existing columns.
But what if adding columns ruins the formatting?Check out the walkthrough below to quickly reset formatting so all the columns are equal width.
To delete a column from a table inside a Google Doc, right-click the column and select “Delete column” from the menu options. You can press Command-Z to undo an accidental deletion, and select “Distribute columns” from the same menu to set the widths back to default once the column is gone.
You can click anywhere in the column you want to delete, including header and body cells. Right-click to pull up the menu including all the options for editing the column, including deleting it entirely.
The “Delete column” option is found below the insertion options, directly below the “Delete row” option.
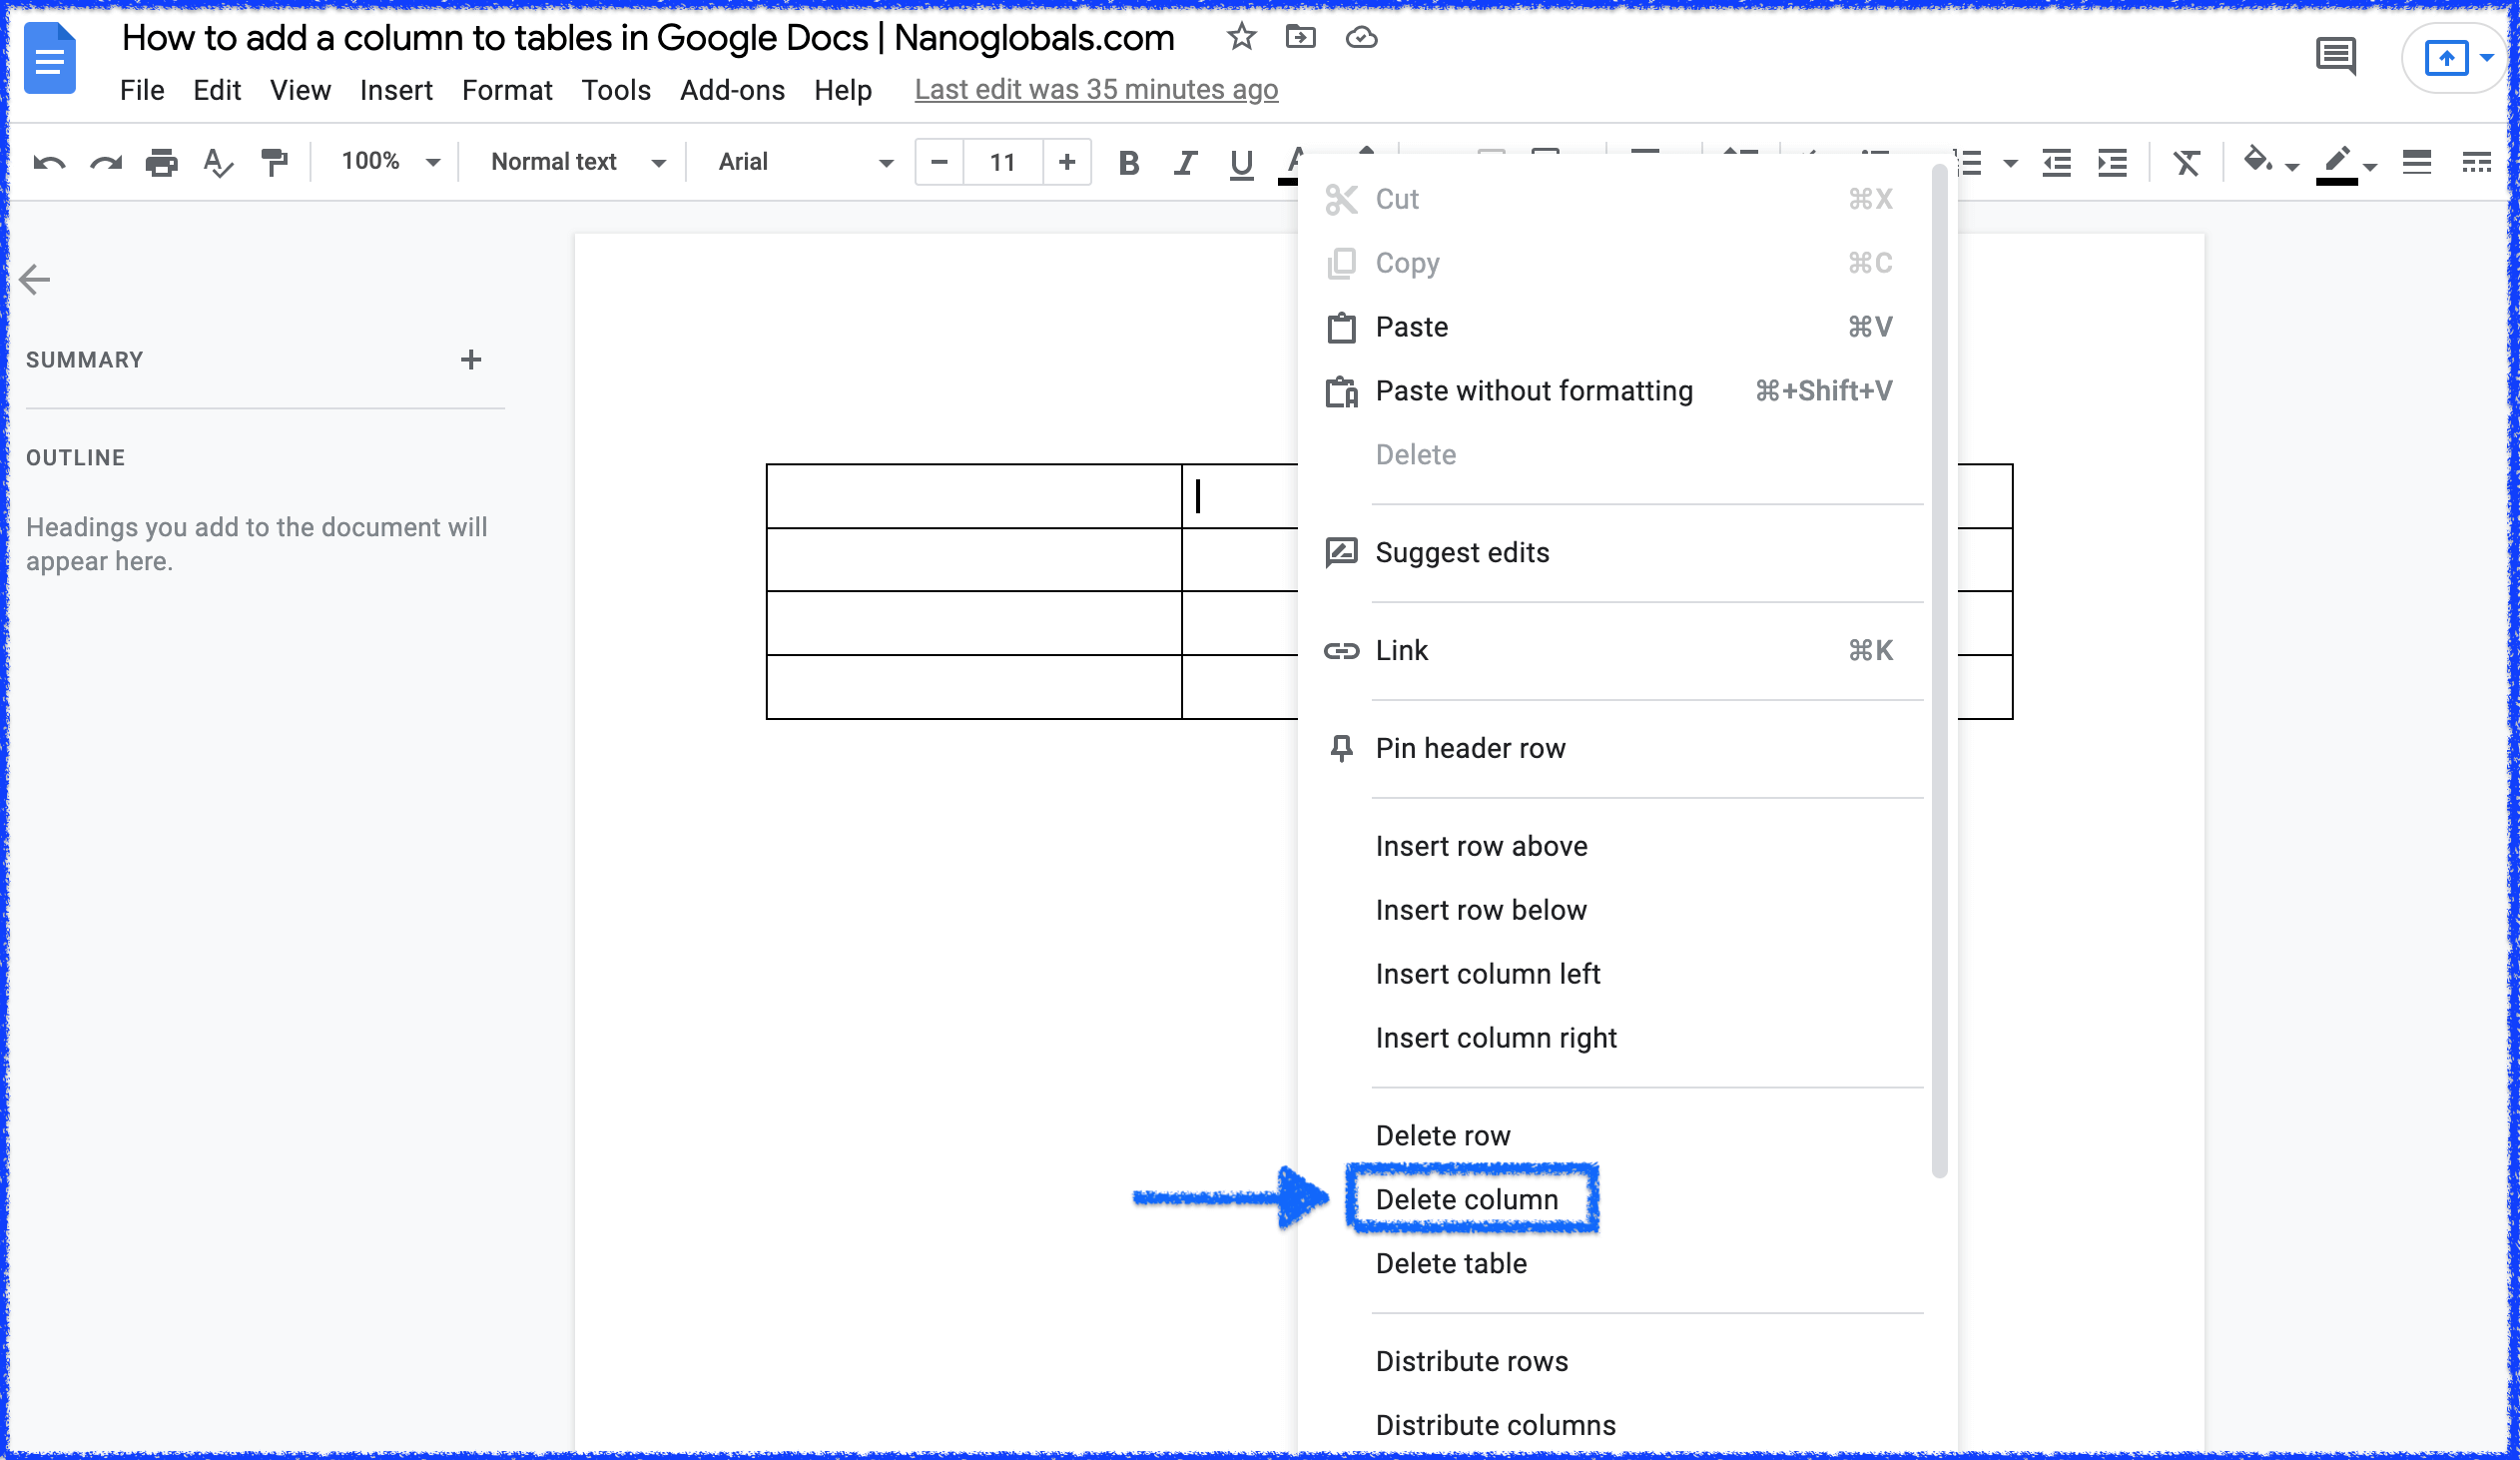
If you delete a column by accident, you can Command-Z to add it back.
Selecting “Delete column” removes the column, and any contents within it. Keep in mind that once deleted, you will have to rely on version history of the document to access content of columns deleted.
Make sure version history is turned on when doing complex data management inside the document, and consider working in an external Google Sheet rather than directly inside the document if your contents are complex.
To add a row to a table inside a Google Doc, right-click an existing row and select Insert row above or Insert row below. To remove a row, right-click the row and select Delete row from the menu.

To quick-add a row to the bottom of an existing row, hover a few pixels to the left of the table. You’ll see a quick-add menu pop up, which includes a “+” button. The “+” button will add a row directly below the row you’re hovering over.
Note that this only works on desktop, not on mobile. There are no quick-add options for deleting or manipulating rows, only for adding them.
To access the full suite of edit options for a row, right-click the row. A menu will appear containing all the available options.
The “distribute rows” option in Google Docs tables resets the width of all columns to be the same.
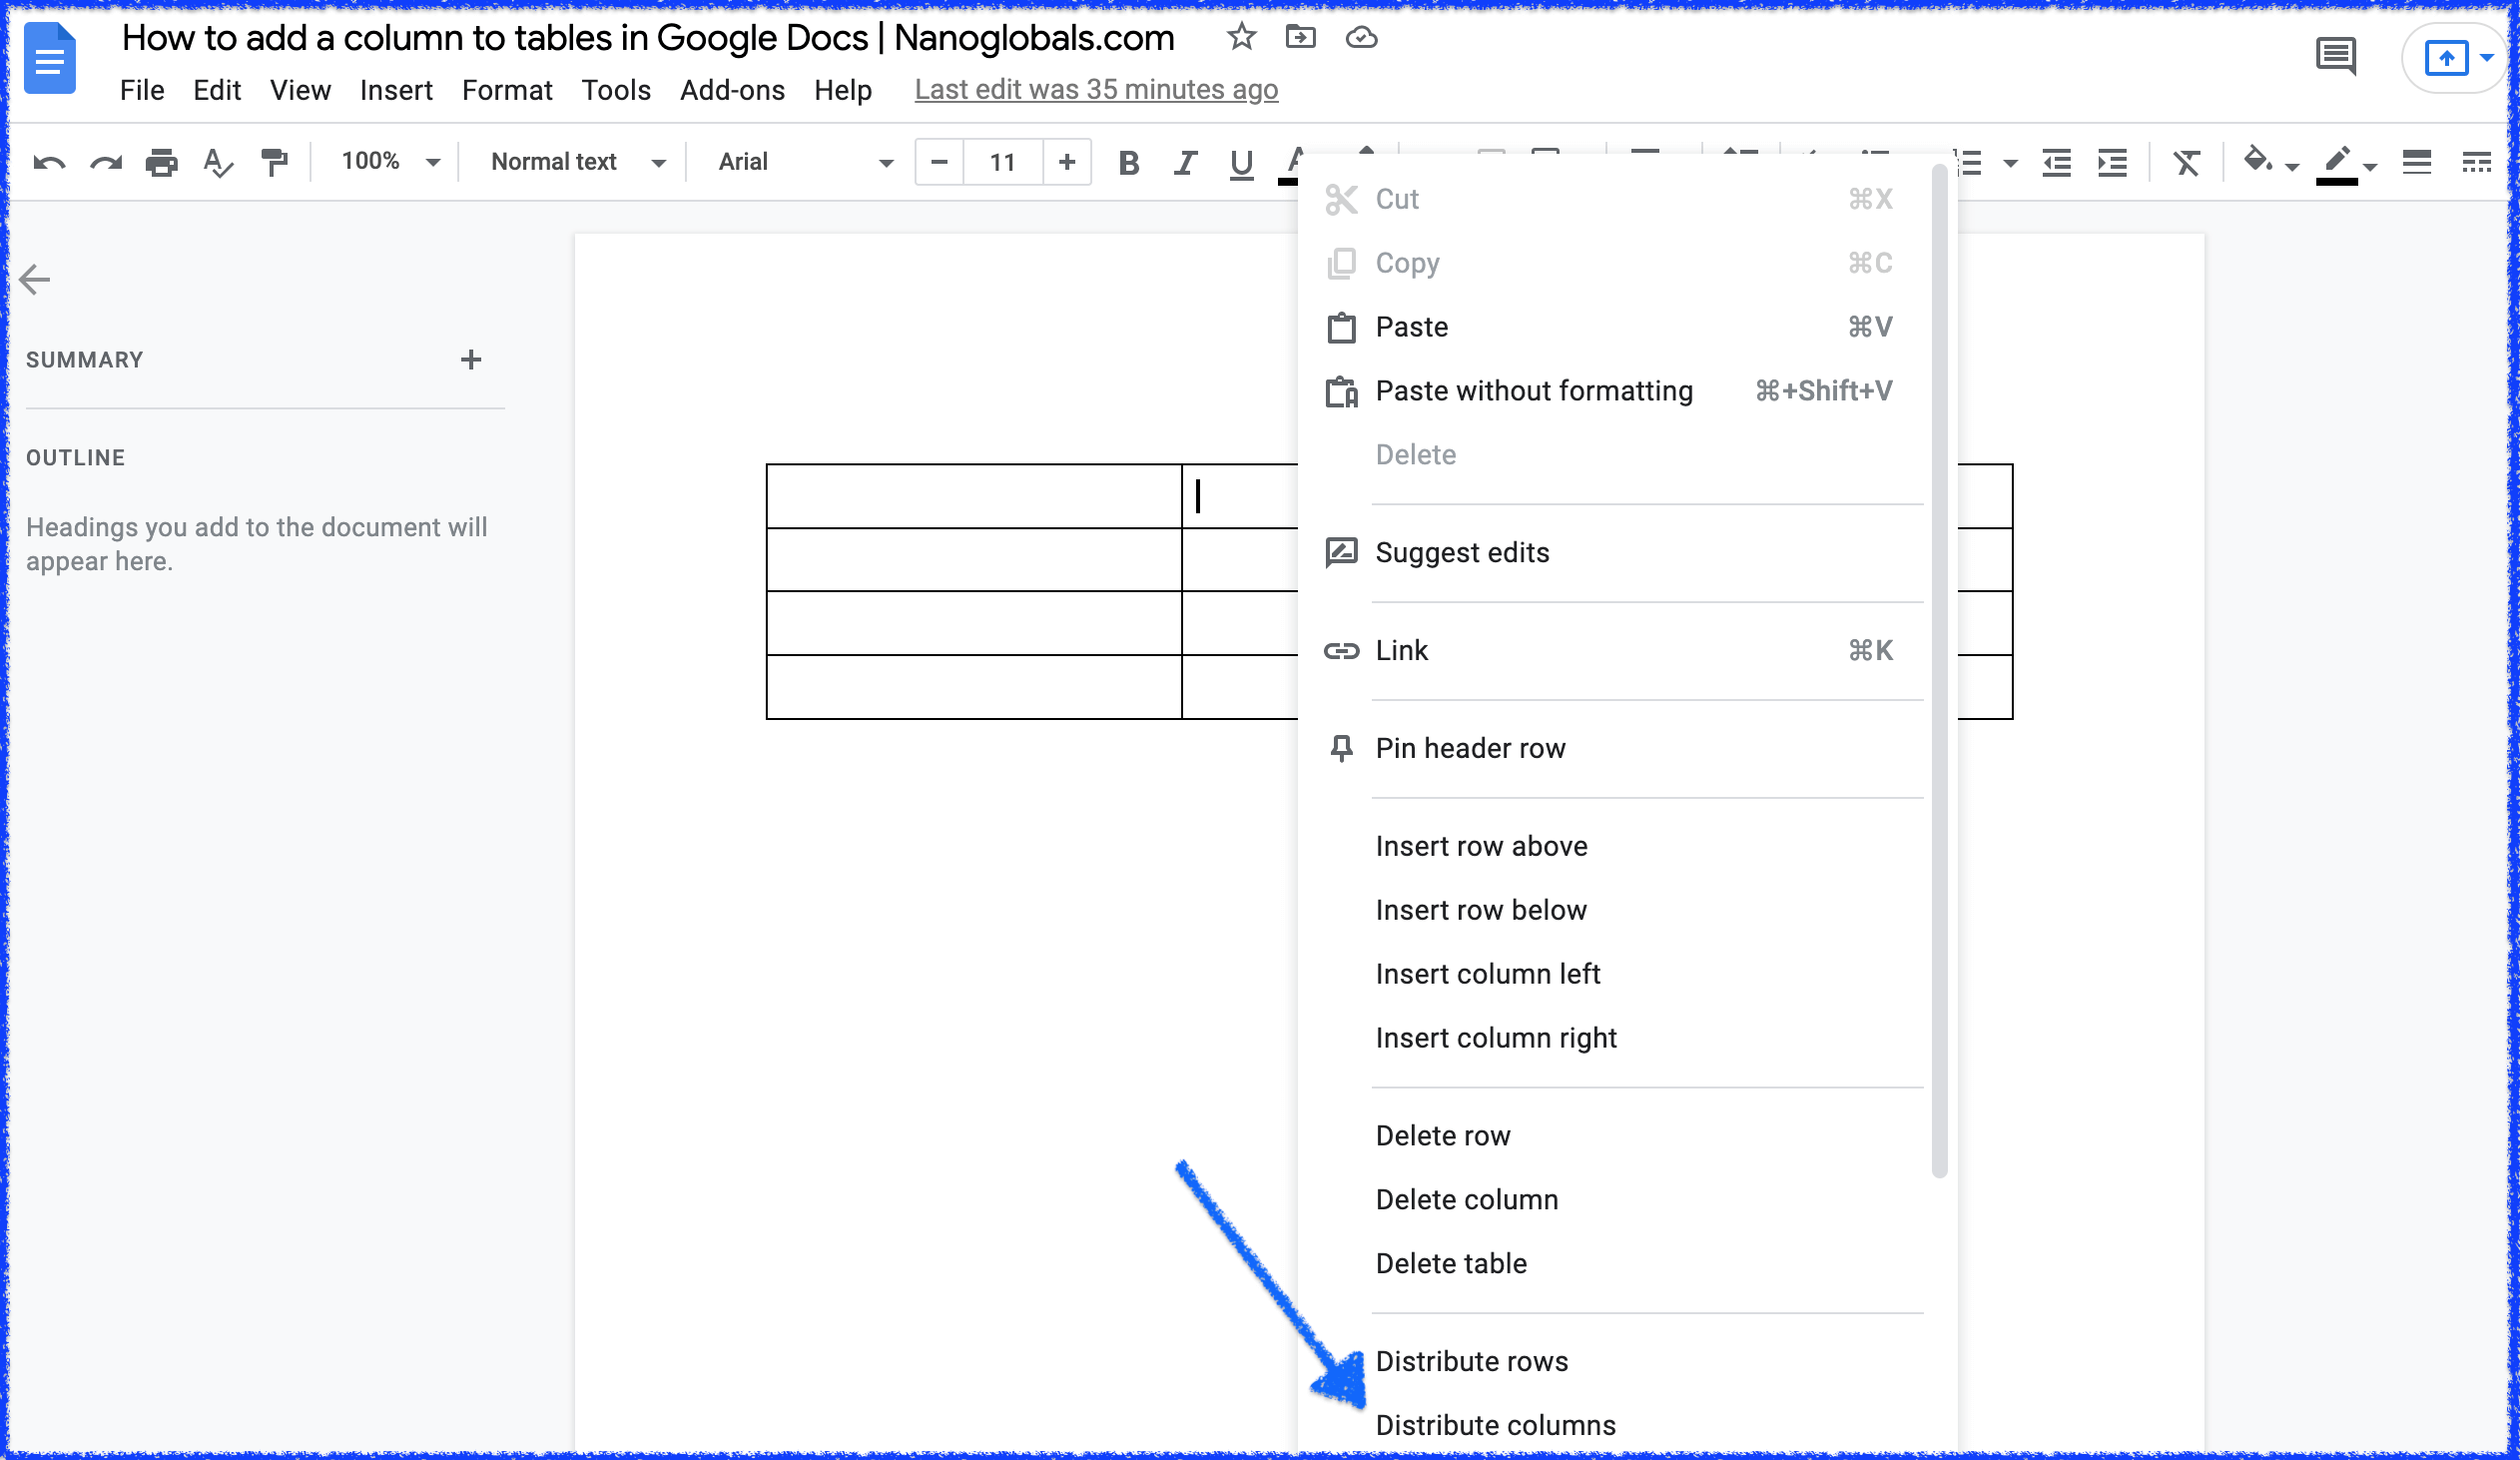
This is very useful if you’ve been adjusting columns on the fly while working on a project, and need to make sure everything looks clean before passing off the document share link.
Note that the content of the columns doesn’t matter for this command — they will reset to the same width regardless of the contents.
The easiest way to add a column to a table inside Google Docs is to right-click an existing column and select Insert column right or Insert column left. The same menu provides options for removing columns, and adding or removing rows.
To make columns even in a table in Google Docs, right-click anywhere on the table and select Distribute columns from the menu items. This will reset the widths of all columns in the table to be even, regardless of their contents.
Hi, I'm Patrick. I made this site to share my expertise on team augmentation, nearshore development, and remote work.